Add Android Auto to Jaguar F-Type
How to Install an aftermarket Apple CarPlay/Android Auto System in a Jaguar F-Type Without Losing Your Sanity (Mostly)
So, you’ve got yourself a Jaguar F-Type—a sleek, growling beast that makes heads turn at every traffic light. Congratulations! But wait, what’s this? The infotainment system looks like it was plucked straight out of the early 2010s? And you’re weaving between lanes trying to reroute on your phone while driving. Fear not, for there’s a solution: installing an aftermarket Wireless Apple CarPlay and Android Auto Interface.
Buckle up, because this is a story of ambition, frustration, and—if you’re lucky—triumph.
Step 1: Research, or the Pandora’s Box of Forums
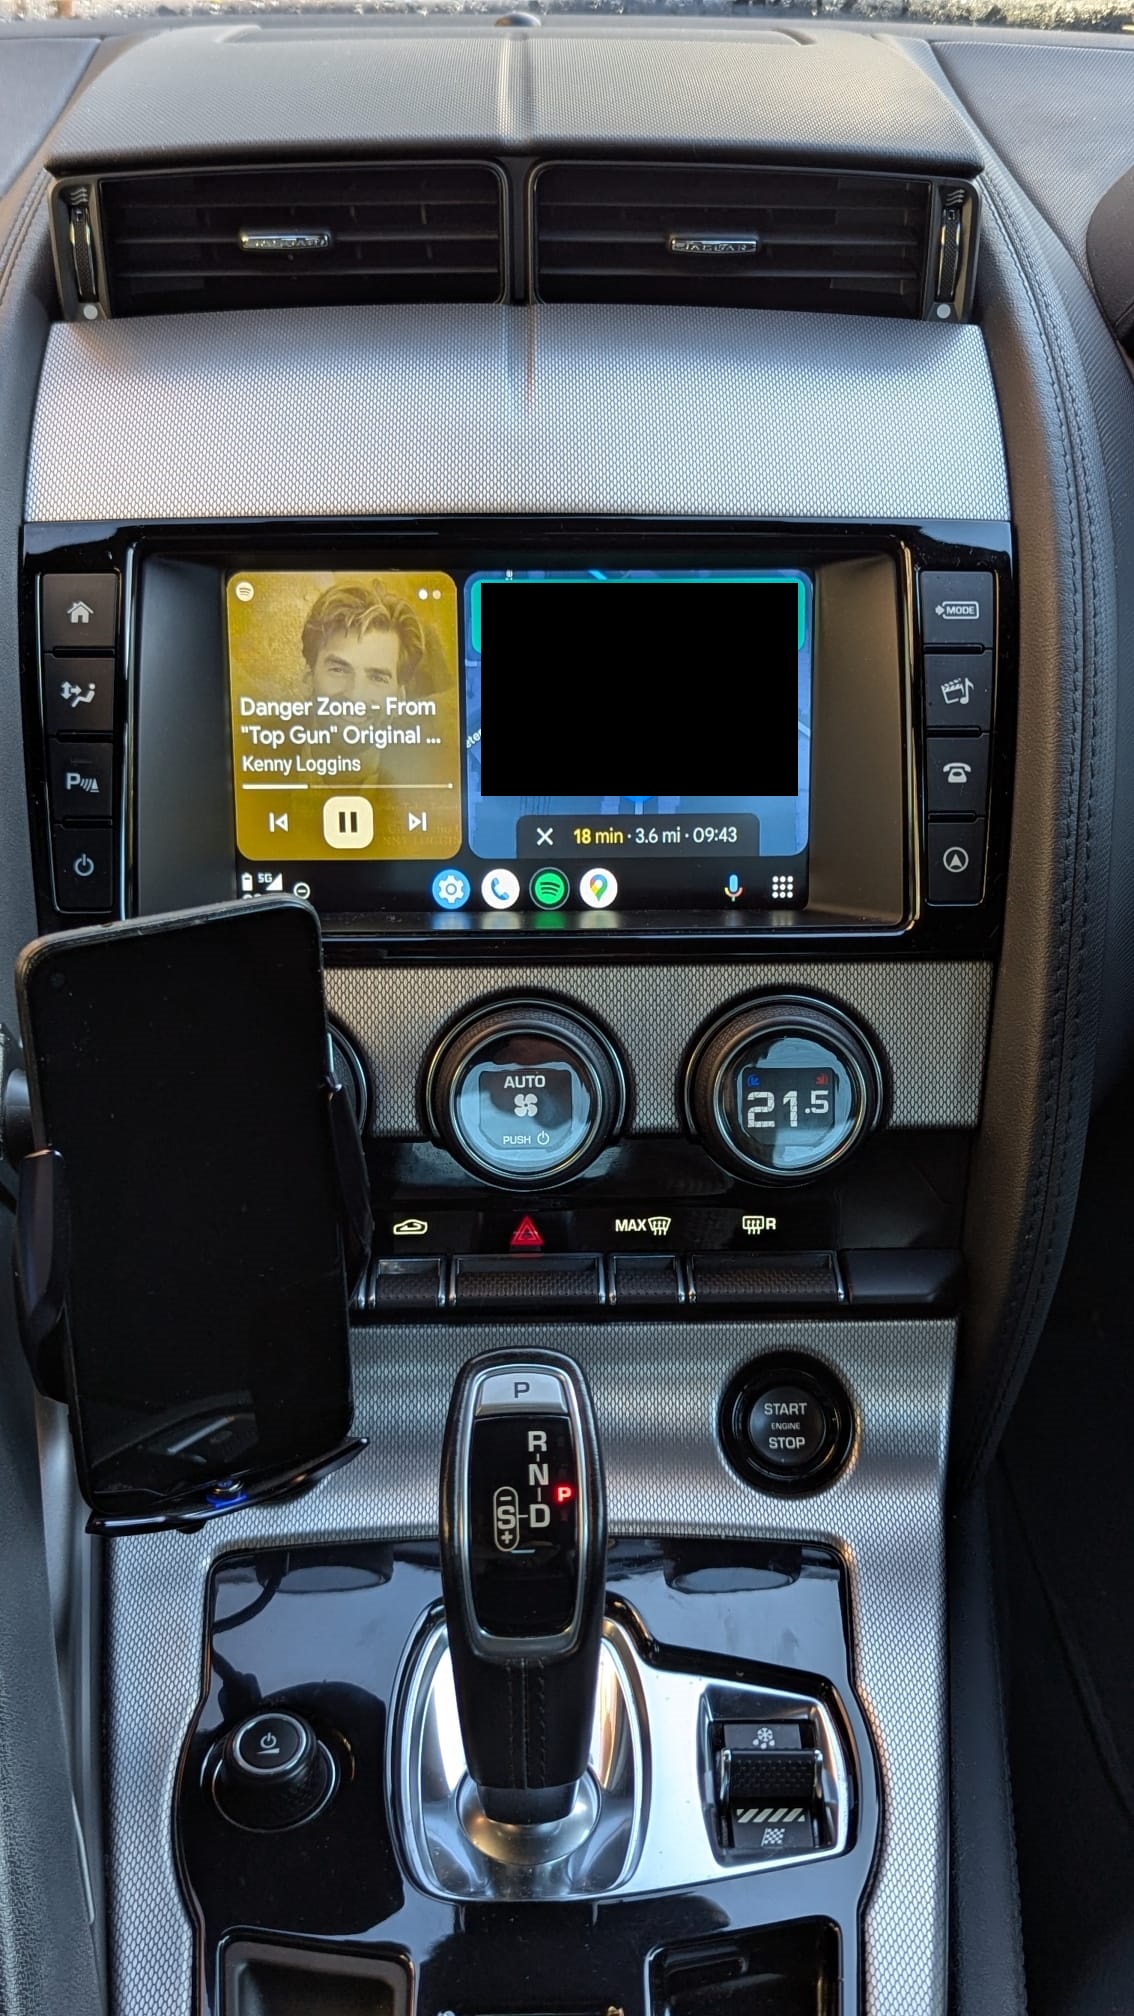
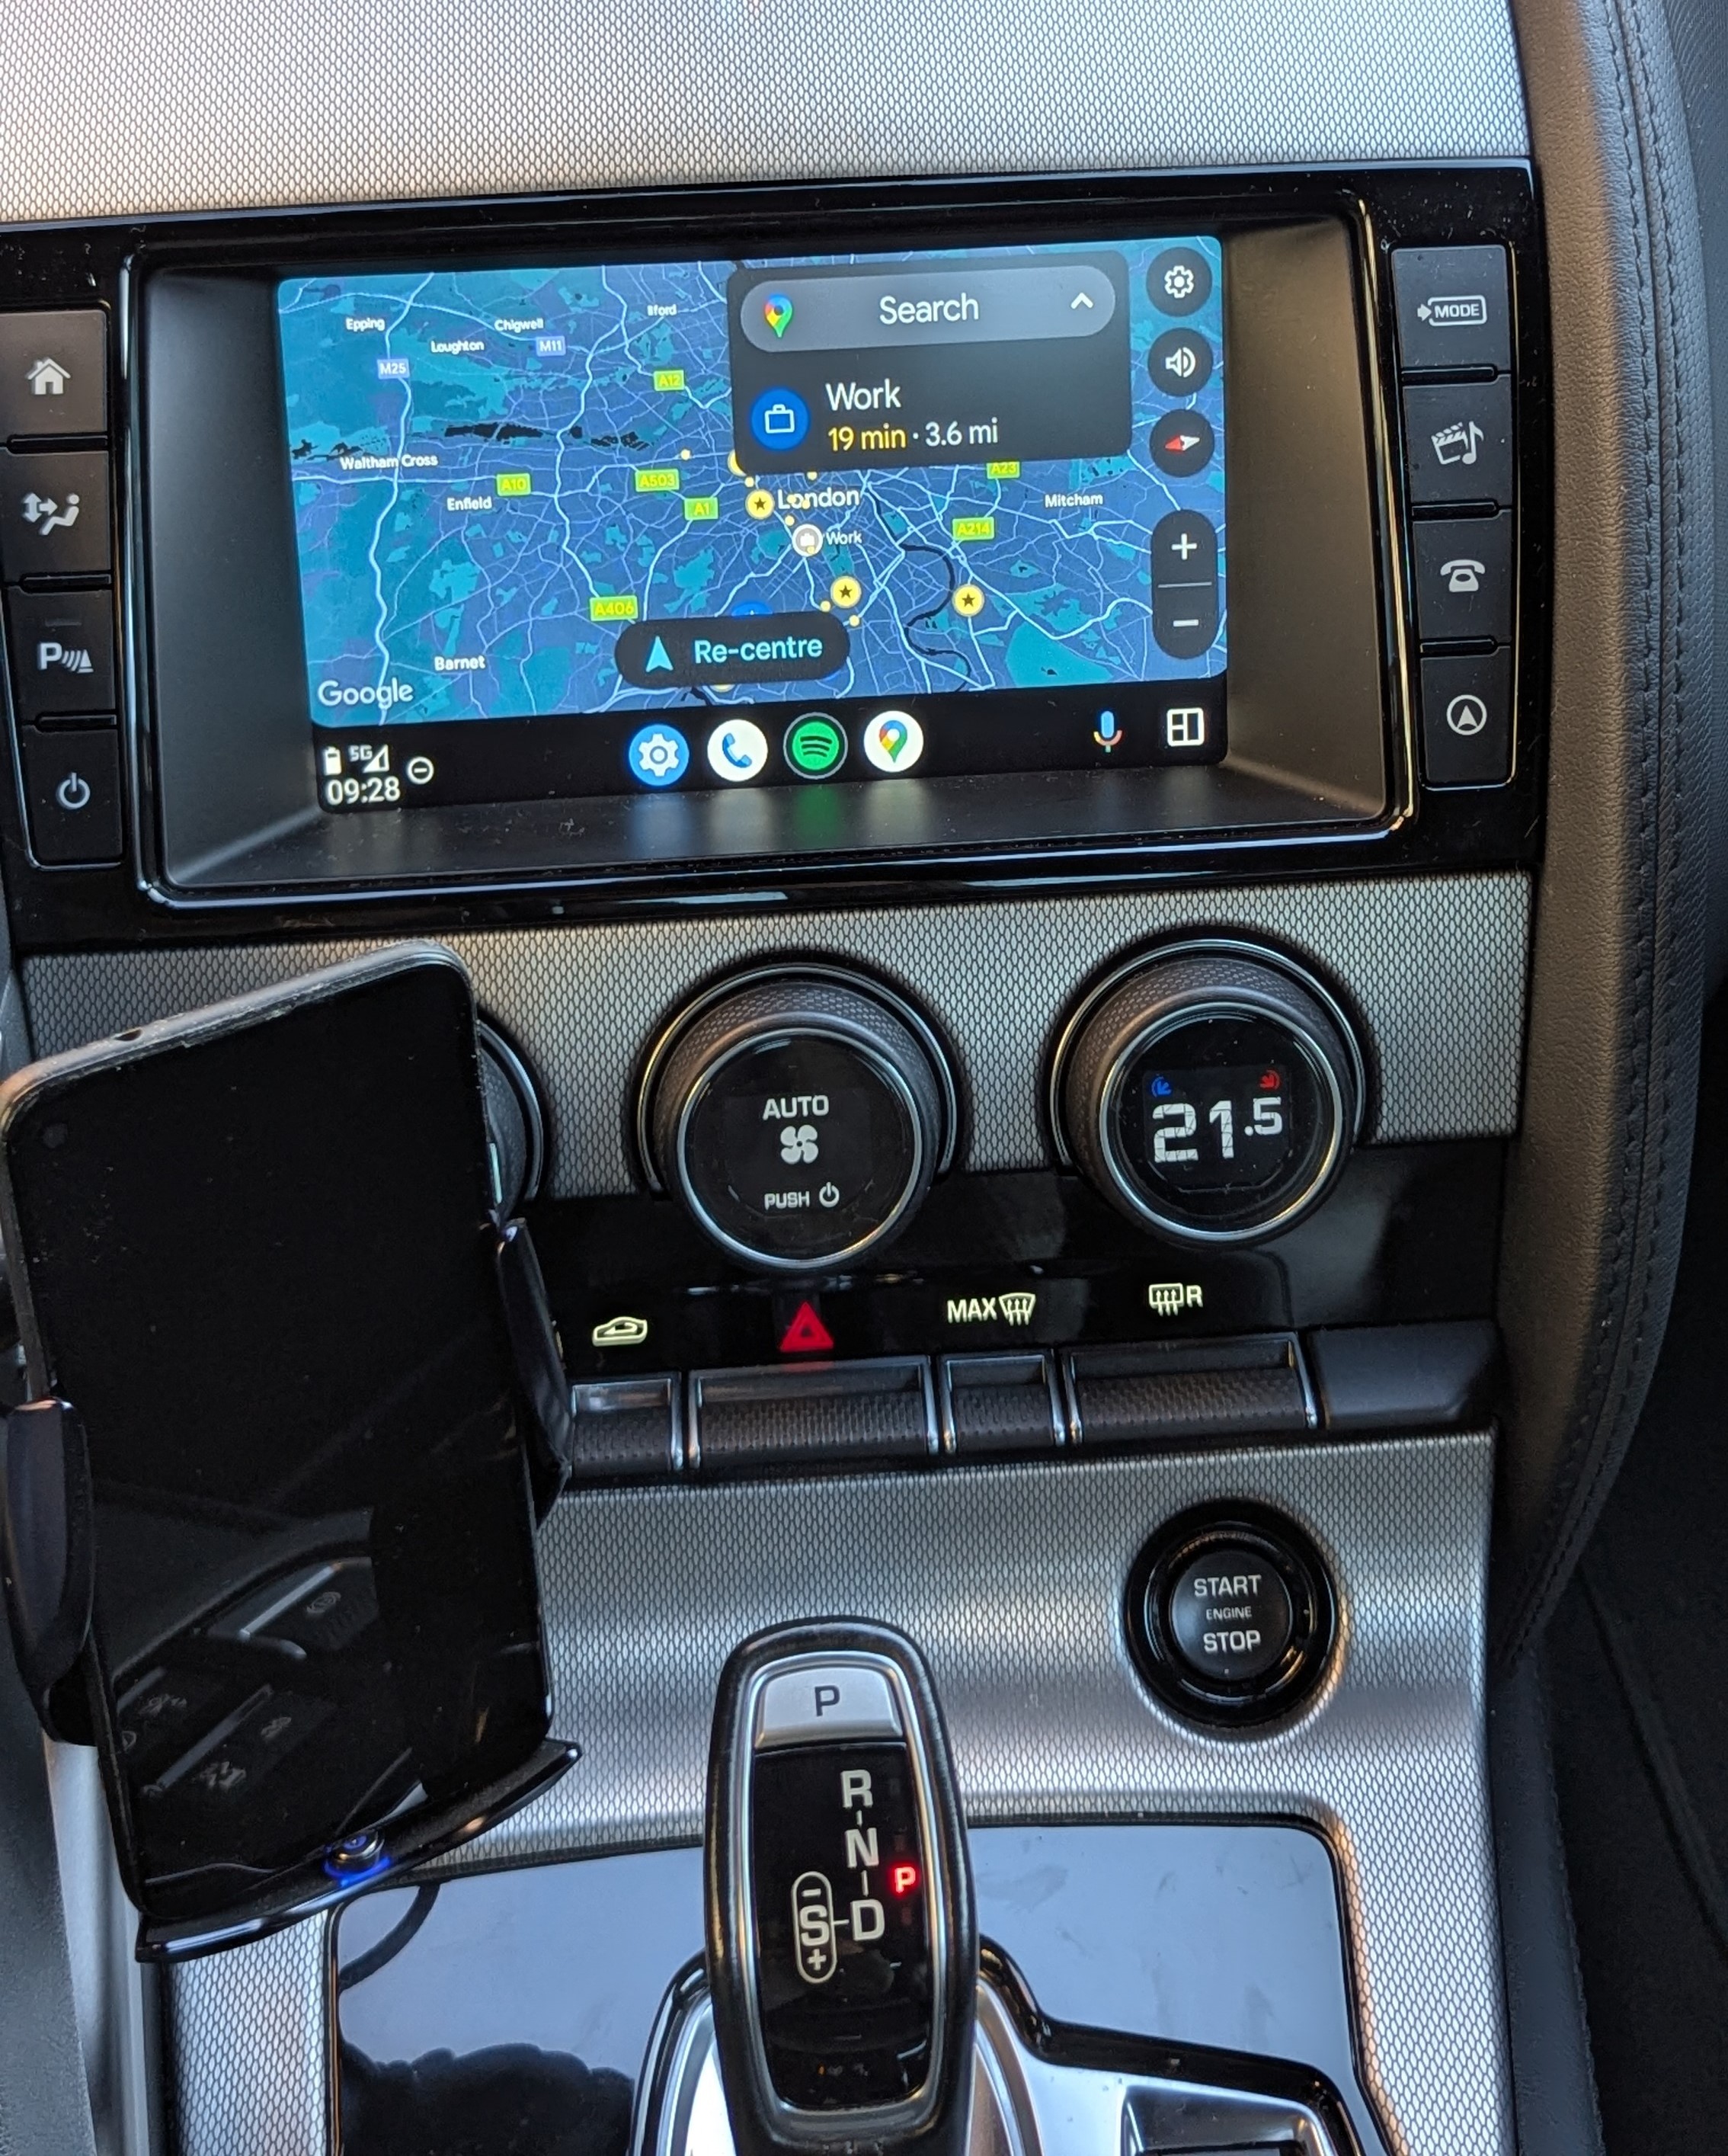
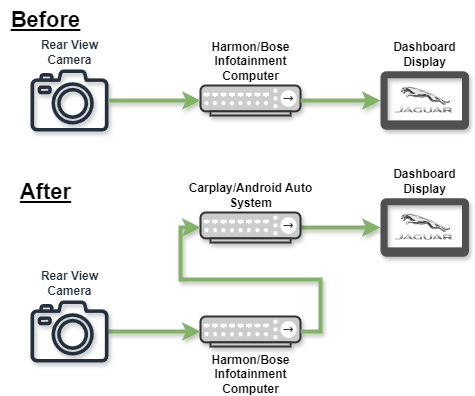
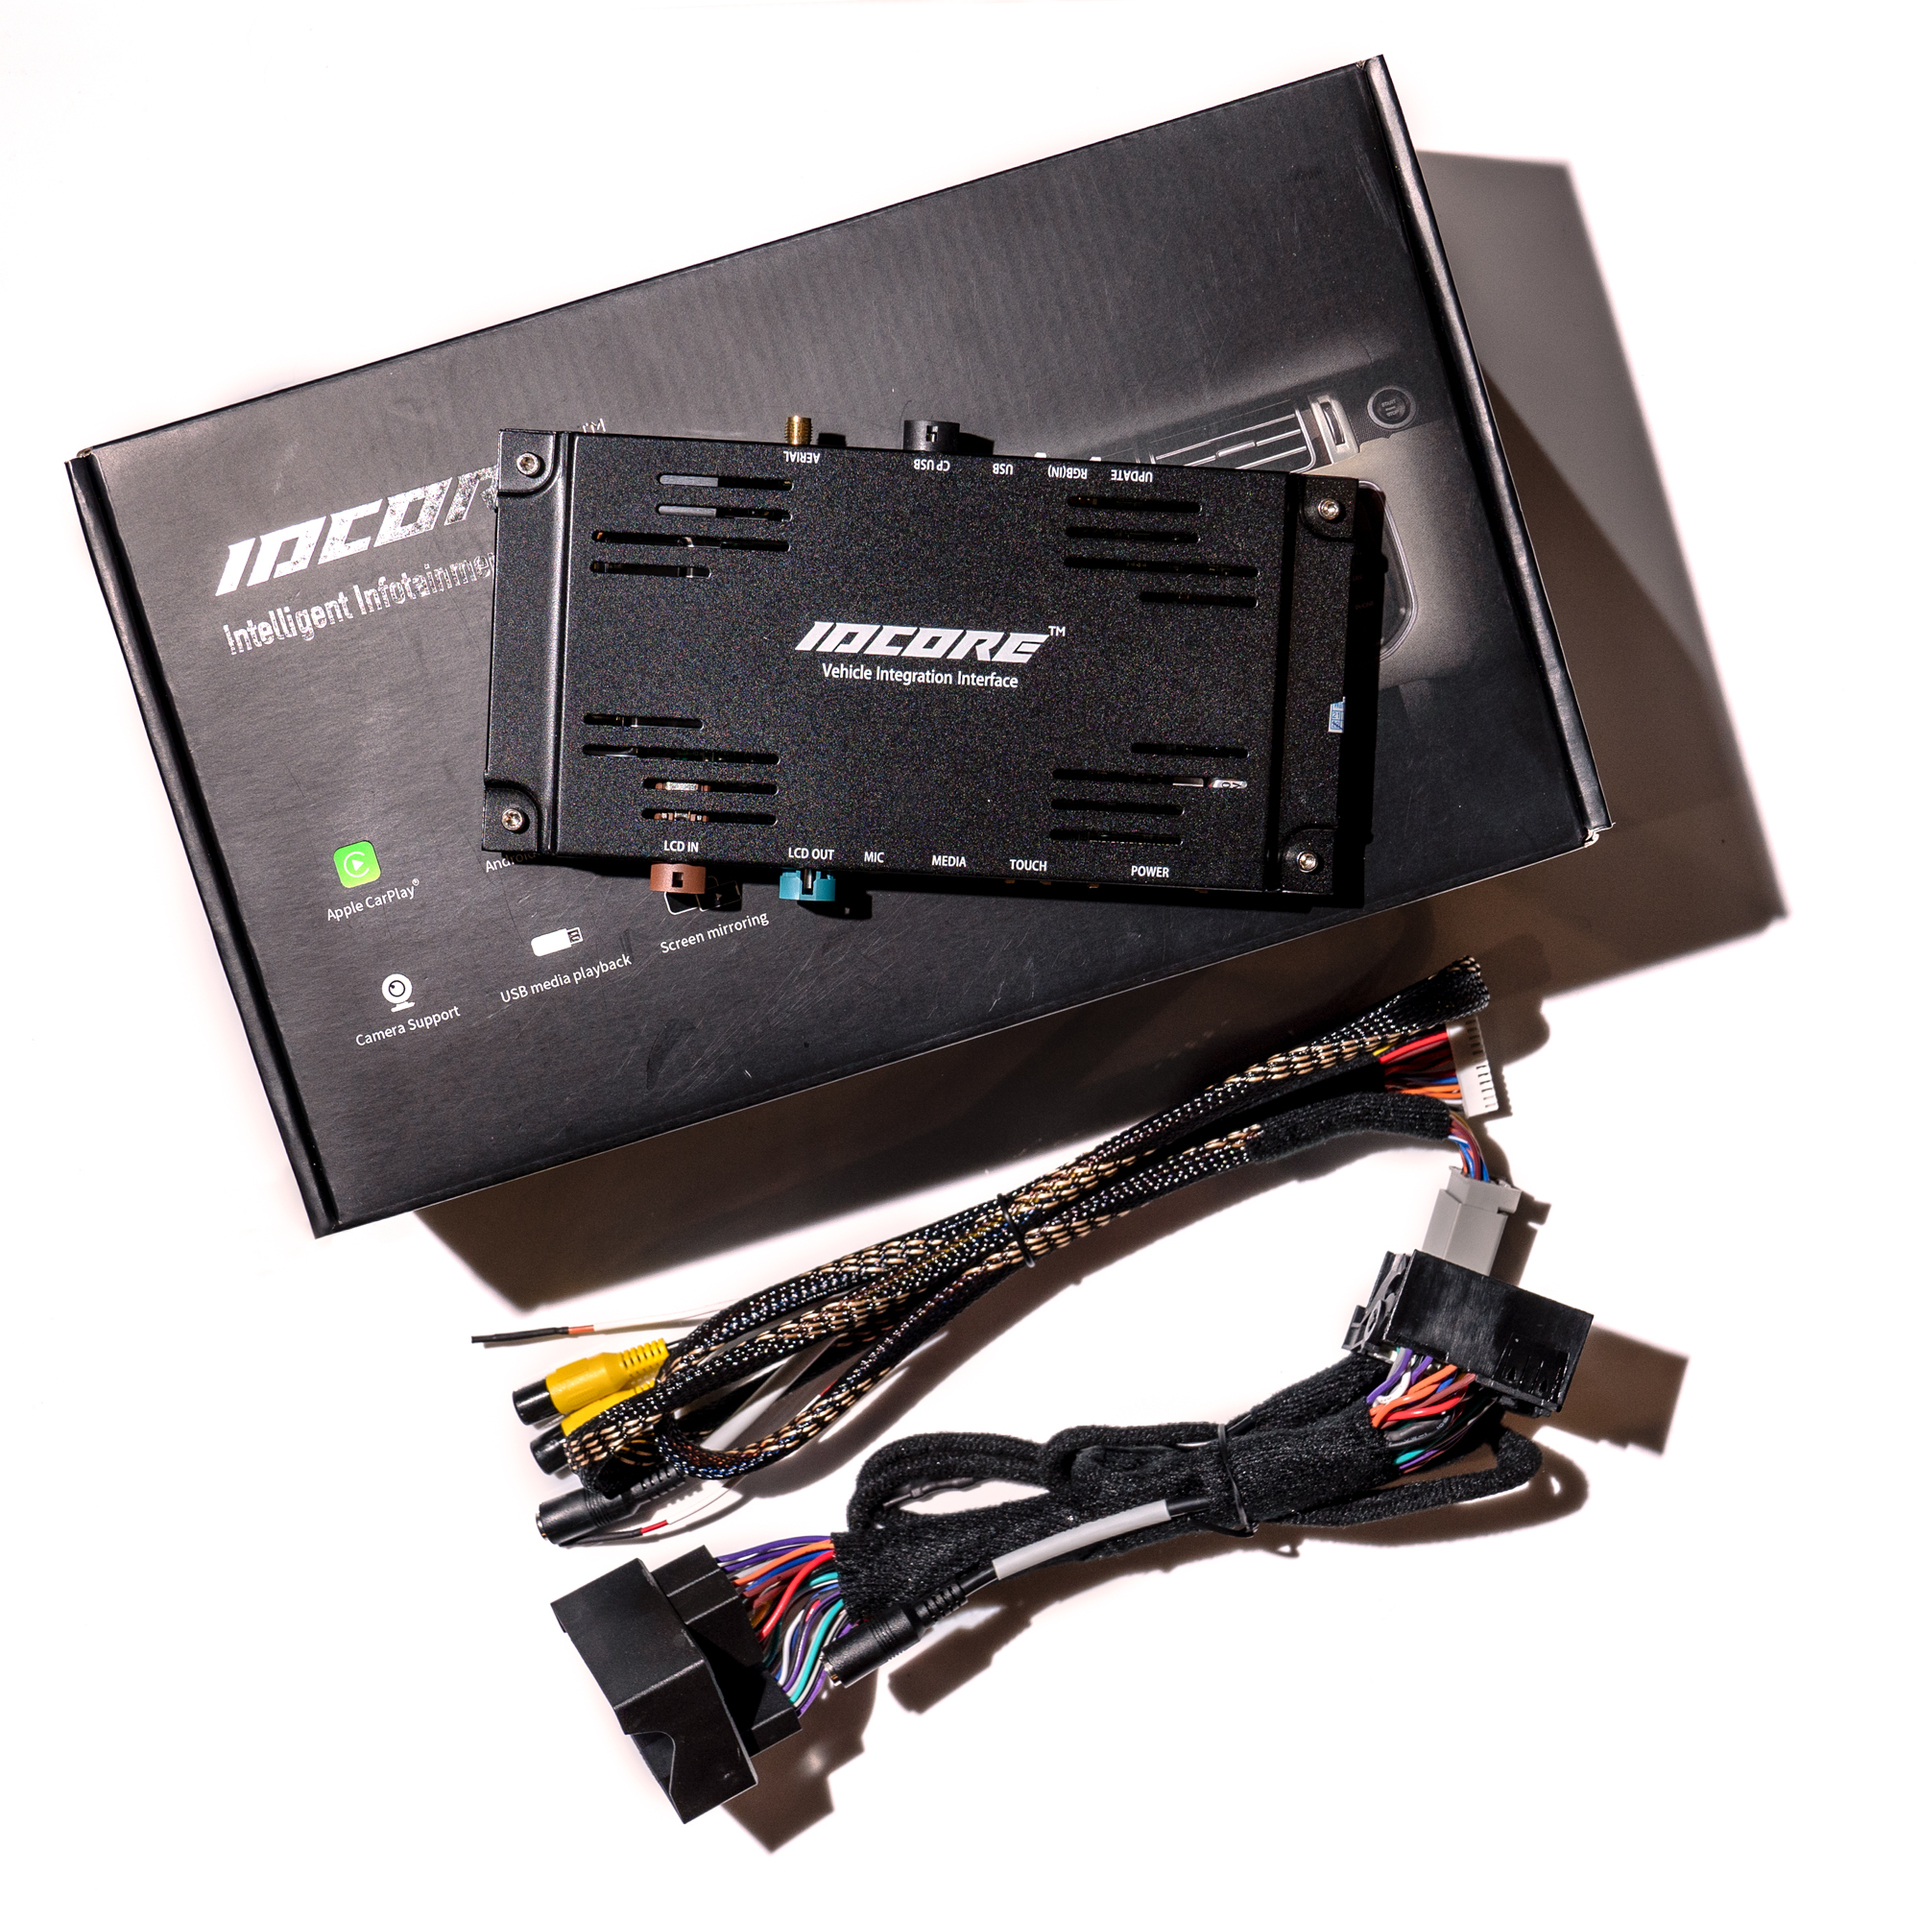
Before you even consider touching your Jaguar’s pristine interior, you’ll dive into the wonderful world of online forums. Here, you’ll find an eclectic mix of advice from self-proclaimed experts, including someone named FastJagLarry92 who swears that his “custom CarPlay mod” also boosted his car’s horsepower. Spoiler alert: Larry’s lying. But amidst the chaos, you’ll learn that this upgrade will involve a box of electronics, a wiring harness, and a can-do attitude. The latter is optional but highly recommended. Buckle up, because this is a story of ambition, frustration, and—if you’re lucky—triumph (no not that sort of Triumph). The wiring harness, the perfect configuration of wires and connectors for your model of infotainment system, achieves the feat of splicing the new box of electronics in-line with your existing infotainment system. By holding down the HOME button the dashboard, you’re able to toggle between either the factory system, for the usual map and radio, OR the apple carplay/android auto system for online maps, music and podcasts. It’s a best of both worlds.
Step 2: Buy a Kit
There’s a few options available on eBay and Amazon. I picked the one from UK firm Unique Auto Developments. With a few mails back and forth to confirm which wiring loom would be required for my car (Bose/Harmon/SIM card slot seem to be the variables) they quickly shipped the right kit with good clear printed out instructions.
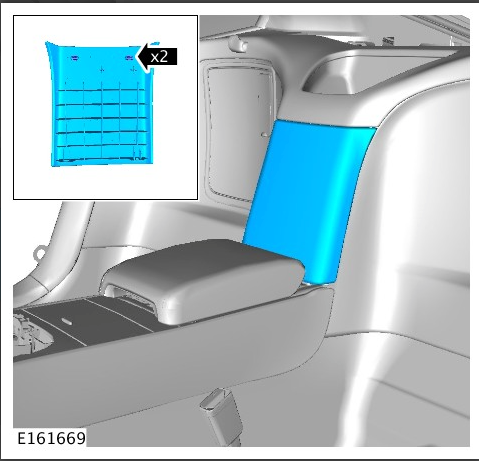
Some Jaguar models have the infotainment system tucked behind the dashboard display, requiring careful removal some of the dash. Fortunately for me, in my MY17 coupe, it’s within an easy to open panel between the seats.
Step 3: The Wiring Maze
Ah, the wiring harness—a beautiful, tangled monstrosity that looks like it could power a small spacecraft. At least the color-coded spaghetti matched the included instructions. There were some handy “IN” and “OUT” labels on cables to match with markings on the various boxes of electronics. Pro tip: Bribe a youth with nimble fingers to help. There’s tiny plastic tabs on the connectors than need to be pushed in to release. They’re on the underside and not visible. Also, you should have no children within earshot as it’s fiddly as hell and you’ll be swearing in no time! I found the 3.5mm jack, elsewhere in the kit, was just the right shape, when pushed to the underside of a connector, to hit the tab and release it. The chunky connector for the bulk of the wires has a clip along it’s length with a leaver mechanism to pull it on/off the original head unit. Its bundle of wires needed to be bent down to allow the leaver mechanism to open wide enough. This step really tested my patience but suddenly things aligned back there and it was on! The 3.5mm jack terminates the now defunct AUX socket between the seats. A USB cable tucks into between seat storage for connecting or charging phone, but Bluetooth wireless works fine too. A stick-on microphone, which I placed near the driver’s seatbelt buckle, ensures the unit can hear your voice. This is useful for saying “Hey Google! Get me to the nearest petrol station” for some hands free rerouting.
Step 4: The Moment of Truth (or Not)
After what feels like a lifetime, things are finally wired up and you fire up the car. Even atheists say a little prayer at this point. The screen flickers to life, and—wait, the familiar factory system appears. So far so not broken anything. Now hold down the HOME button, the new system appears. Victory! …until you realize the sound isn’t working. Back to the wiring harness and instructions you go.
Step 5: Celebrate Your Success (Eventually)
Once everything’s working, you’ve paired your phone, you’ve adjusted volume levels to avoid distortion (I set the IDCore system to about 80%), it’s time to take your new setup for a spin. You’ll marvel at how seamlessly your phone integrates with your Jaguar, letting you navigate, stream music, and even dictate texts while driving. Sure, it cost you an afternoon, some sanity, and loss of feeling in your fingertips, but wasn’t it worth it?!
Final Thoughts: Would You Do It Again?
Absolutely. The phone maps have up to date road speeds, you’ll know where the roadworks are and, best of all, where the speed cameras are! So here’s to you, brave Jaguar owner. You’ve turned your feline roadster into a tech-savvy beast. Now, go drive it like you stole it—because after that install, you kind of earned it. “Hey Google!, play Highway to The Danger zone!”
Wondering if you should get an F-Type? Check here because YOLO!
If this was helpful, see my other F-Type articles filed under ftype